Turning simple shapes into complex shapes
As I’m drawing more icons for my icon set, I want to share some tips on how you can learn to do the same. I never considered myself much of an artist. The icons are coming out much nicer and cuter than I thought I’d be capable of. It doesn’t take a lot of experience if you know how to use a few tricks.
Most of the icons I draw are made up of simple shapes. Let me walk you through the steps that lead up to a “stack of coins” icon.
Step 1: Draw a 24×24px canvas.

I draw all icons on a canvas of the same size. Limiting the available space helps me keep them at the same level of detail.
Step 2: Make the outer 2px a “safe area”.
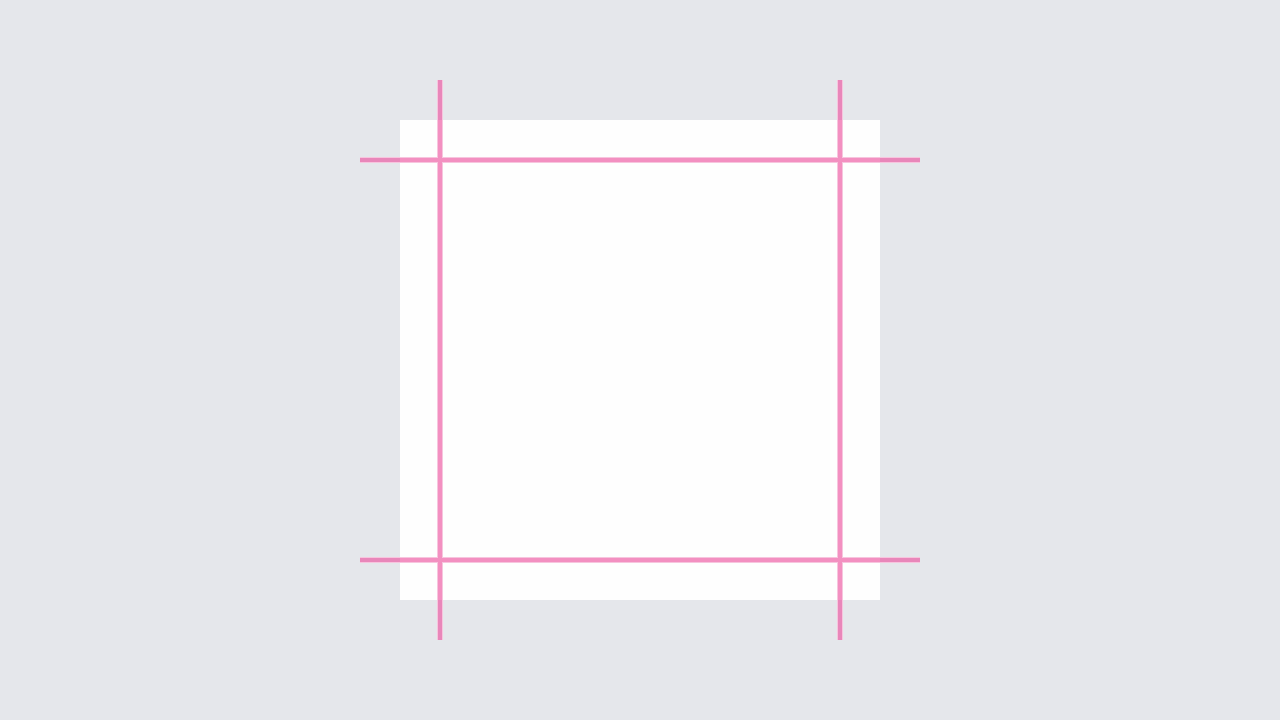
For most icons, I avoid drawing on the outer 2px along the edges. That gives the icons some padding, and me some extra space in case an icon needs it. If one doesn’t work in the inner area alone, it can bleed into the safe area a little. The icon we’re drawing here fits into the inner area.
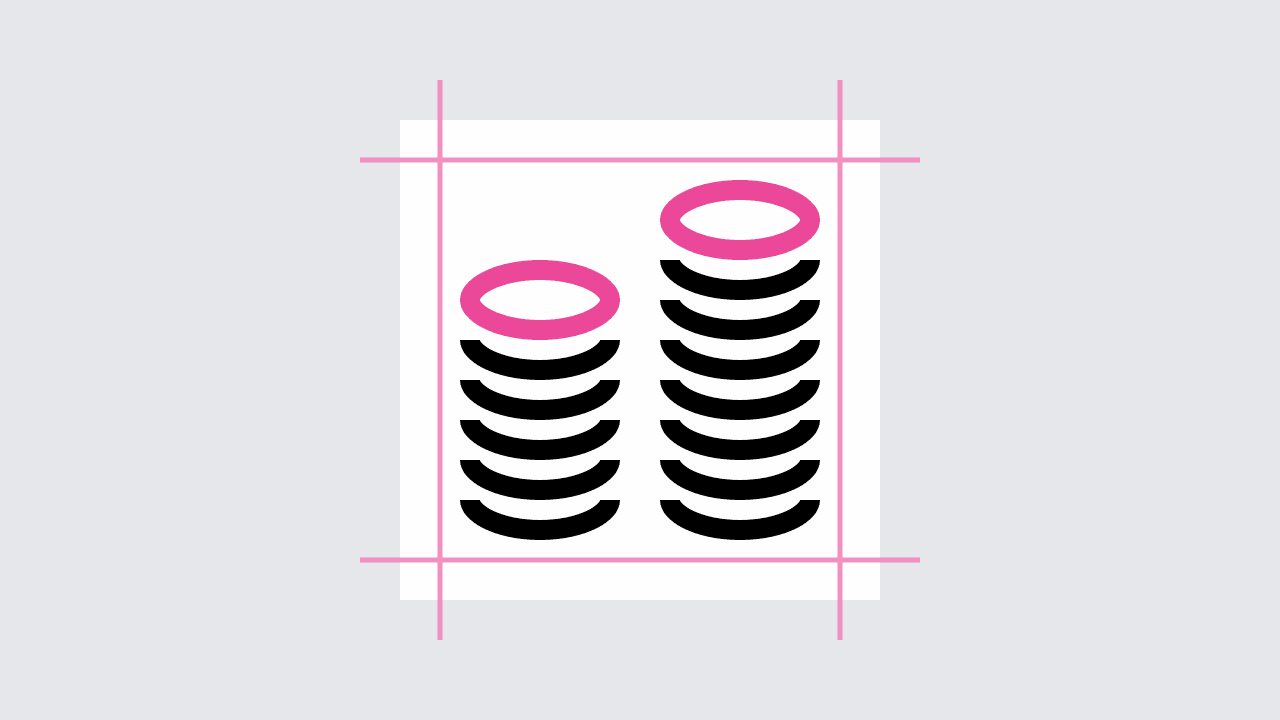
Step 3: Draw two 8×4px ellipses.
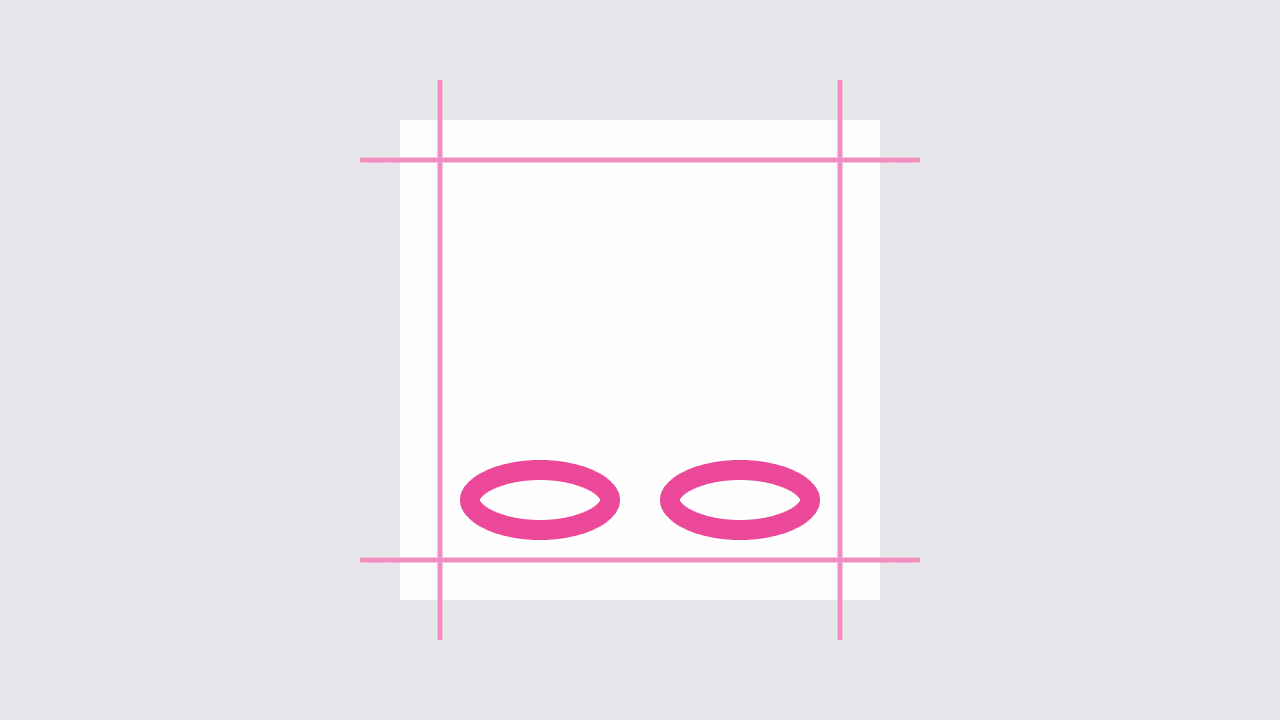
We start at the base of the stacks with two ellipses. Let’s leave some space between them horizontally.
Step 4: Cut off the top halves of the ellipses.
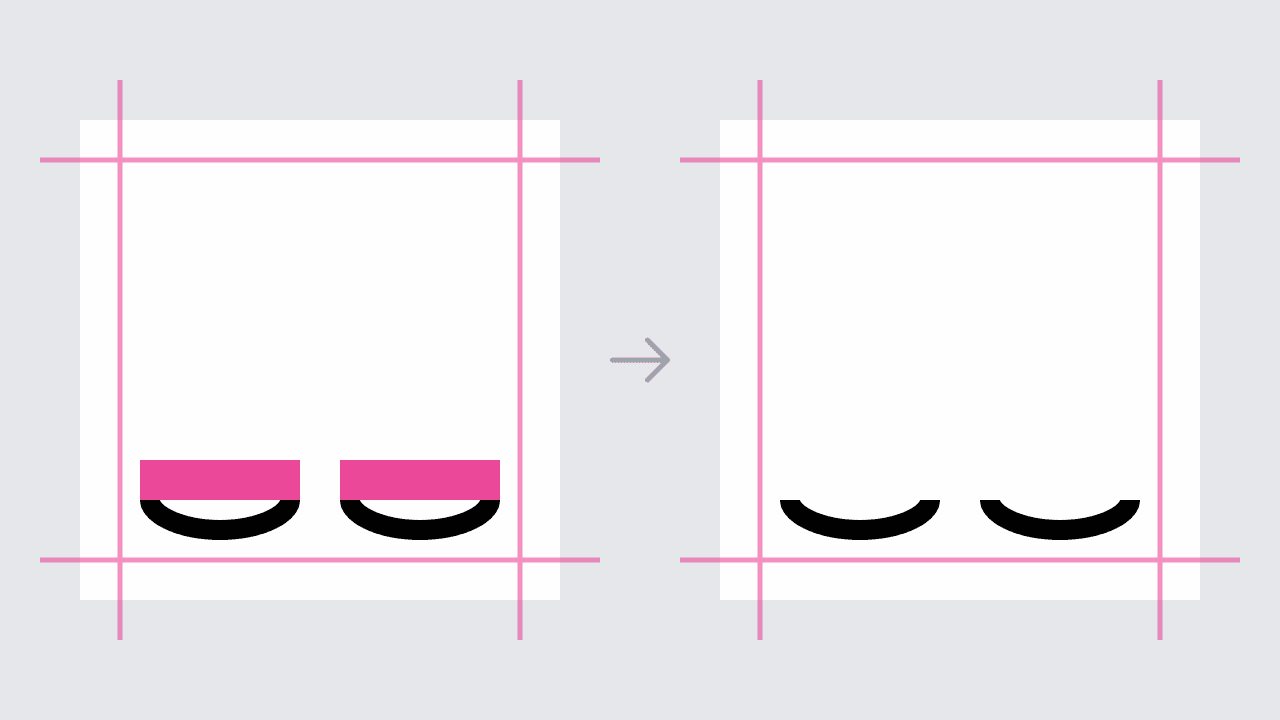
Because the coins at the bottom will be covered by others stacked on top of them, we cut off the parts we can’t see.
Step 5: Duplicate the half-ellipses a few times.
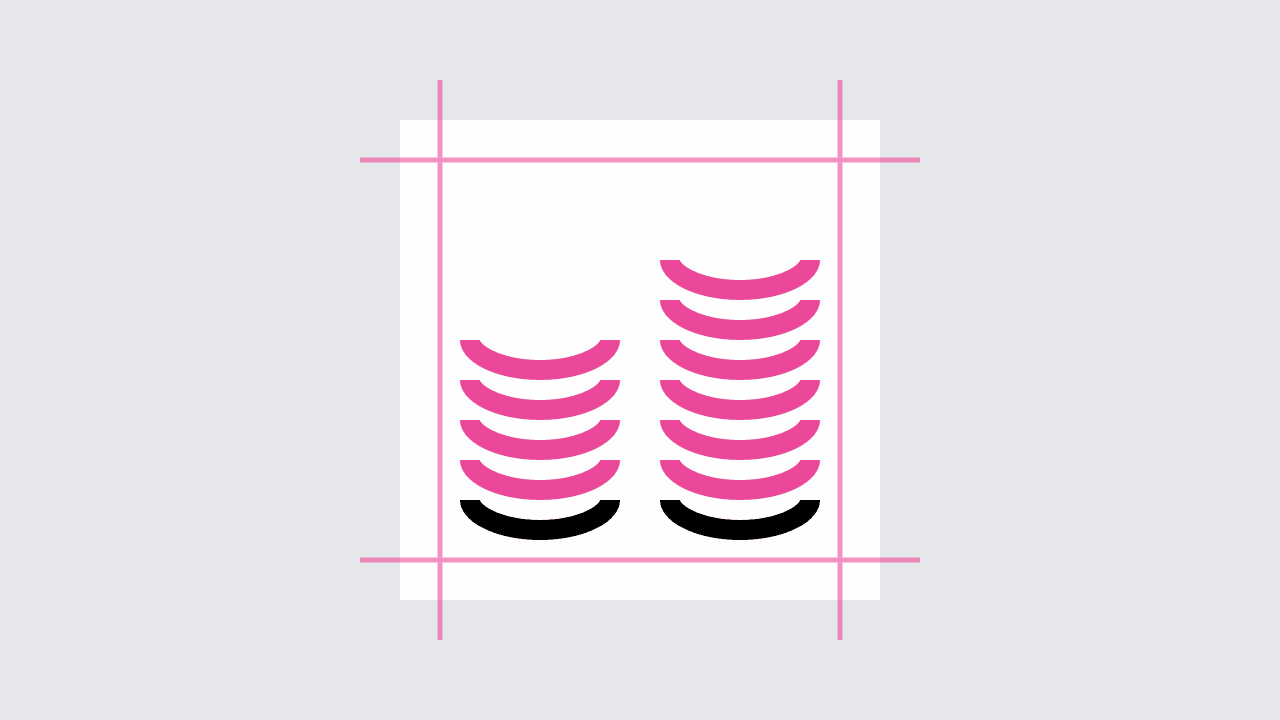
We add layers to the stacks by duplicating these half-ellipses a few times. By using different amounts of copies, we give the stacks different heights.
Step 6: Add two full 8×4px ellipses to the top of the stacks.
Because the top two coins are fully visible, be add two complete 8×4px ellipses at the top.
Step 7: Draw four vertical lines along the edges of the stacks.
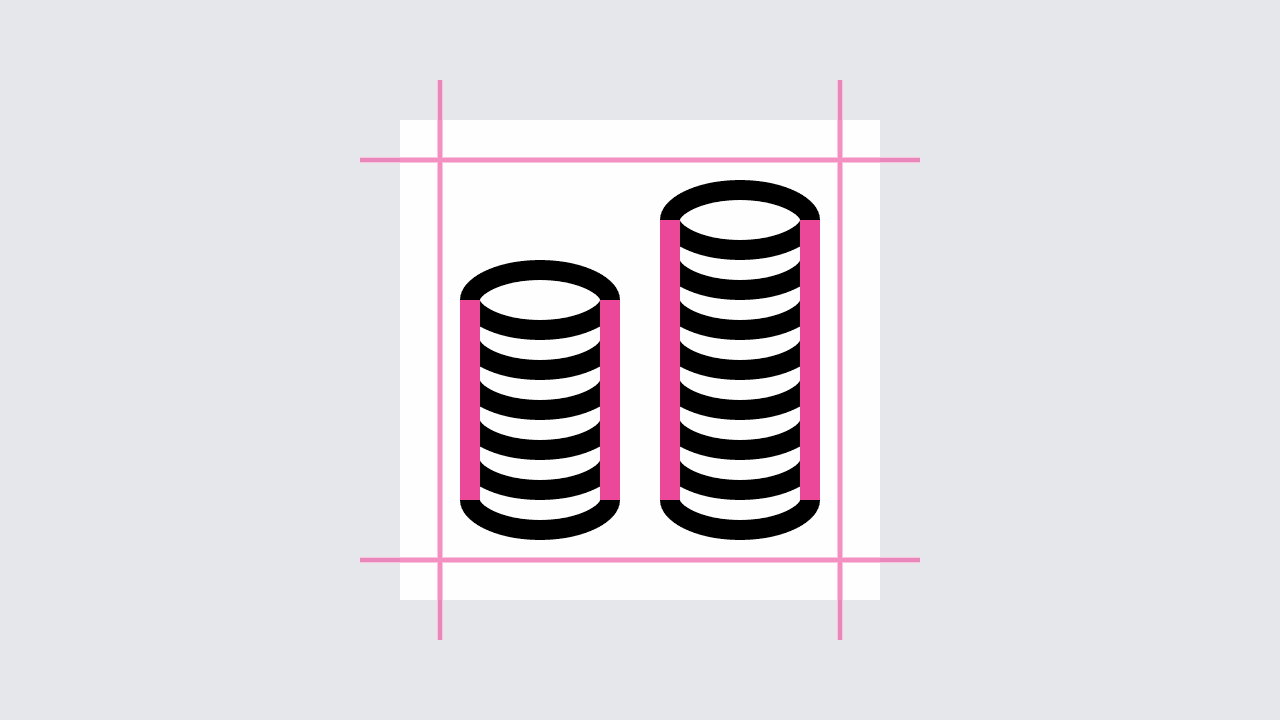
By adding edges to the stacks, the individual lines start looking like stacks of coins.
Step 8: Cut out an 8×8px circle in the center between the stacks.
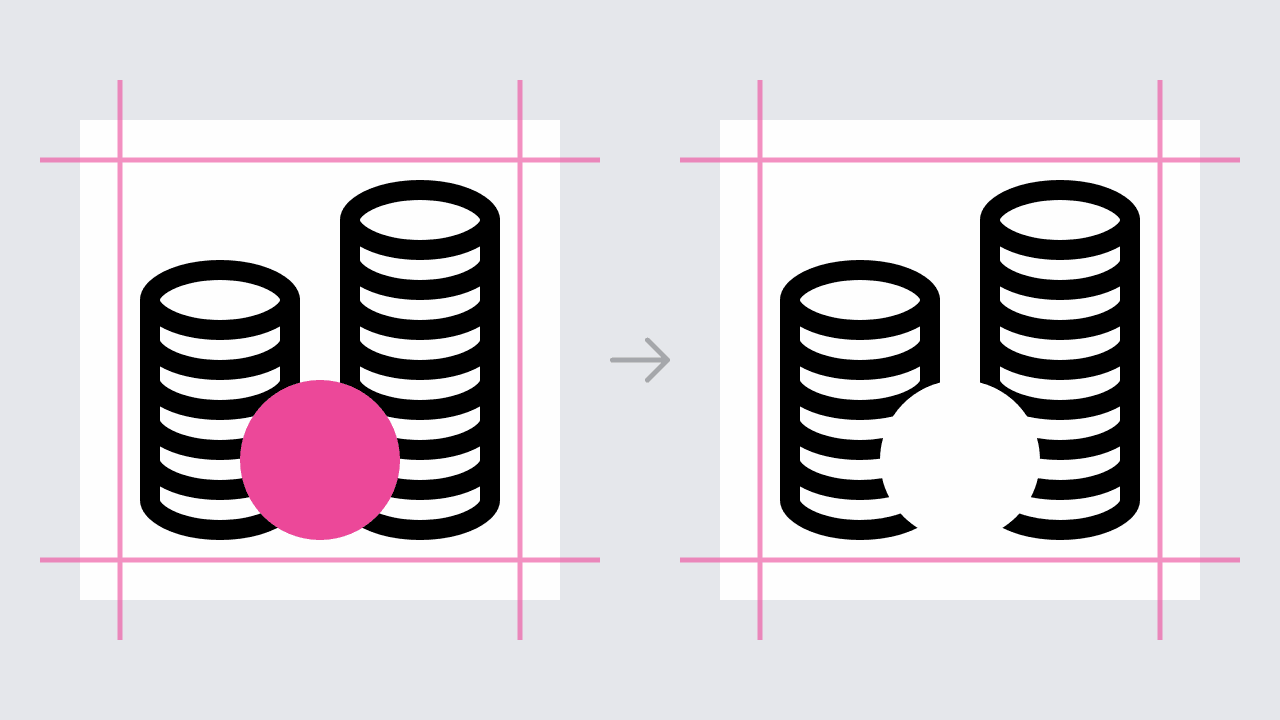
Next, we need to cut out an 8×8px circle in the center between the two stacks. That’s where we want to put a single sideways facing coin. If we didn’t cut out this part, the stacks would be visible through that coin.
Step 9: Draw an 8×8px circle in the spot we just cut out.
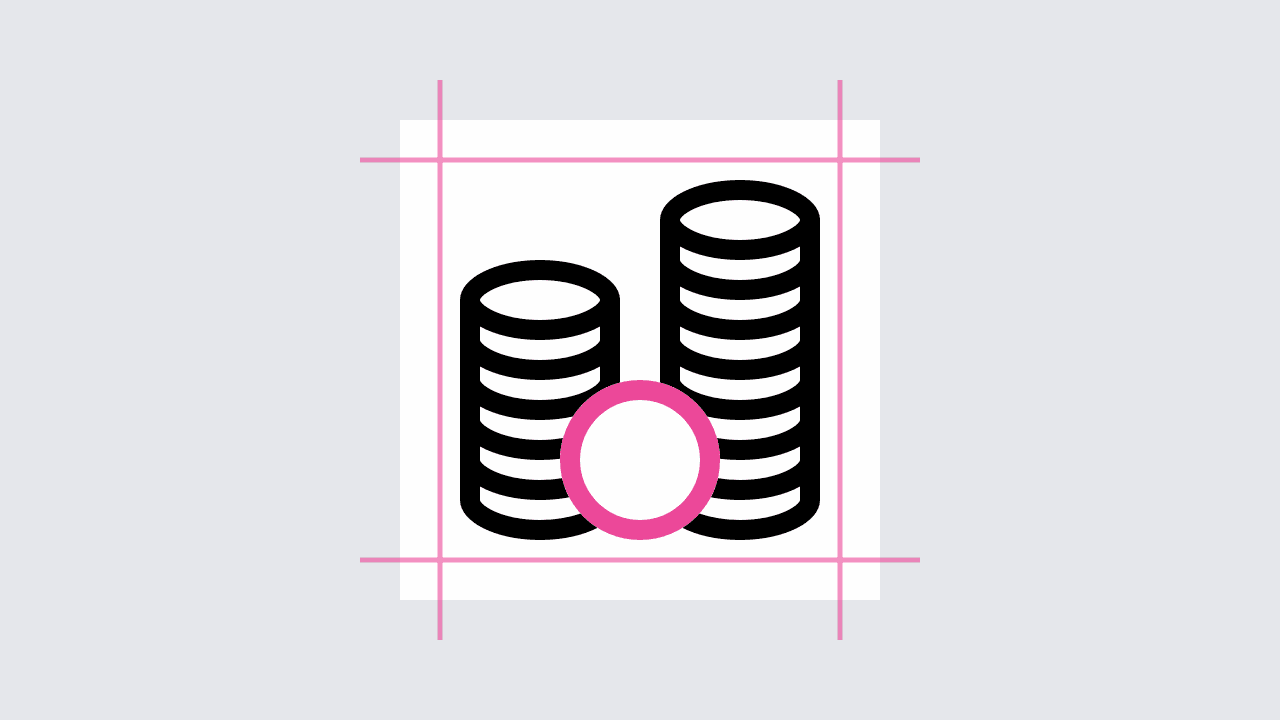
With the space for it empty, we can now add the sideways facing coin in that middle spot.
Step 10: That’s it, you’re done!

There are no more steps, our stacks of coins are complete.
We turned with a few ellipses, four lines, and a circle into stacks of coins. I found that once you know what to look for, it becomes a lot easier to see how icons are created.
The rest of my icons follow very similar rules. That speeds up the process of creating new icons and helps them follow a consistent style. The set is still not complete yet, but it’s constantly growing!
If you want to get into drawing icons and want to know the steps behind some of the others, hit me up! I’d be happy to create walkthroughs like this for a few more icons.